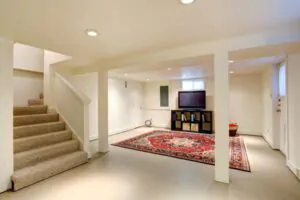
Transforming your basement into a cozy living space starts with framing the walls. Many homeowners wonder about the correct method for framing a basement wall. This DIY project can seem challenging, but with proper guidance, you can handle it yourself.
Framing basement walls is a key step in finishing your lower level. It creates the structure for insulation, electrical wiring, and drywall installation. This guide will walk you through the process of framing a basement wall, from preparing the area to installing the final stud.
If you’re looking to increase your home’s value and expand your living space, here’s how to begin.
Key Takeaways
- Seal and insulate basement walls before framing to prevent moisture and improve energy efficiency.
- Install studs 16 inches apart on center, using pressure-treated lumber for the bottom plate to resist moisture damage.
- Secure the frame by nailing the top plate to floor joists and using a powder-actuated tool to fasten the bottom plate to the concrete floor.
- Add fire blocking every 10 feet vertically and install drywall backers 2 feet apart to meet building codes and provide support.
- Use 2-inch XPS foam board for insulation, apply a vapor barrier, and caulk seams to keep the basement dry and comfortable.
Preparing the Basement for Framing
Get ready to transform your basement into a cozy living space. Proper prep work ensures a smooth The framing process is crucial for a finished basement. and a dry, comfortable room.
Seal and Insulate the Walls
Sealing and insulating your basement walls is a key step in framing. This process keeps moisture out and improves energy efficiency.
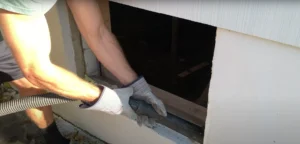
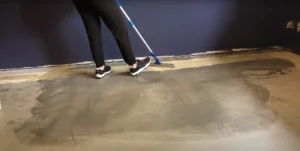
- Clean the walls: Remove dirt and debris with a wire brush. Vacuum the surface to ensure it’s dust-free.
- Apply waterproofing: Use a masonry waterproofing product on dry walls. Spread it evenly with a roller or brush.
- Let it dry: Allow the waterproofing to dry fully. This may take 24 to 48 hours.
- Install foam board: Cut 2-inch XPS foam board to fit your wall sections. This adds insulation.
- Attach foam board: Apply construction adhesive in vertical strips on the back of each board. Press firmly against the wall.
- Seal seams: Use tape to cover all seams between foam boards. This creates a vapor barrier.
- Caulk bottom edge: Run a bead of caulk along the bottom of the foam board. This stops air leaks.
- Cut vapor barrier: If using plastic sheeting, cut it on wood surfaces. This ensures a good tape joint later for finishing a basement.
Layout the Bottom Plate
Laying out the bottom plate marks the start of your basement wall framing project. Grab your tape measure and snap a chalk line 4 inches from the foam insulation. This line guides where you’ll place the bottom plate.
Choose a pressure-treated board for the bottom plate to resist moisture damage.
Cut the bottom plate to match the wall’s width. If you’re not using pressure-treated lumber, lay down a sill gasket first. Acceptable options include fiberglass insulation, black plastic, or a vapor barrier.
These materials create a moisture barrier between the concrete and wood.
Measure twice, cut once.
Secure the bottom plate to the concrete floor using appropriate fasteners. Powder-actuated nails or concrete screws work well for this task. Space the fasteners about every 16 inches along the plate.
Double-check that the plate is straight and level before moving on to the next steps.
Constructing the Frame
Building the frame forms the backbone of your basement wall project. You’ll need to install studs and top plates to create a sturdy structure. This step requires precision and the right tools to ensure a solid foundation wall for your new space.
Install the Studs and Top Plate
Framing your basement walls starts with installing studs and top plates. This step forms the backbone of your new walls, giving them strength and structure.
- Cut studs to size: Measure from the bottom plate to the ceiling joists. Subtract 3 inches for the top and bottom plates of the unfinished basement.
- Mark stud locations: Use a tape measure to mark 16-inch centers on the bottom plate. This spacing meets most building codes.
- Nail bottom plate: Use a ram set to secure the pressure-treated bottom plate to the concrete floor.
- Install first and last studs: Place these at each end of the wall. Nail them to the bottom plate with a framing nailer.
- Add remaining studs: Set each stud on its mark and nail it to the bottom plate. Use two nails for 2×4 studs or three for 2×6 studs.
- Straighten twisted lumber: If a stud is warped, use a shark-tooth hammer to straighten it before nailing.
- Cut top plate: Measure the length of your wall and cut the top plate to fit.
- Install top plate: Lift the top plate into place. Nail it to each stud with two nails.
- Add second top plate: For extra strength, add another top plate. Overlap joints in the first top plate by at least 4 feet.
- Plumb the wall: Use a level to check if the wall is straight. Adjust as needed before securing it to the floor joists.
Secure and Plumb the Frame
Securing and plumbing your basement frame is a key step in the framing process. This task ensures your walls are straight and sturdy, ready for the next stages of your DIY project.
- Check for level: Use a laser level to make sure your bottom plate is perfectly level. Shim under low spots if needed.
- Plumb the walls: Place a level on the edge of a stud every 4 feet. Adjust until the bubble is centered.
- Nail top plate: Fasten the top plate to every floor joist above. Use 16d nails for this job.
- Add shims: Put shims between the top plate and joists every third joist. This helps keep the wall straight.
- Secure bottom plate: Apply construction adhesive to the bottom plate. Use a powder-actuated tool (PAT) to fasten it to the floor every 6 feet.
- Double-check measurements: Make sure your wall is 1/4 inch shorter than the smallest floor-to-joist measurement. This allows for settling.
- Install fire blocking: Add horizontal 2x4s between studs at the midpoint of walls over 8 feet tall. This stops fire spread.
- Address ductwork: If you have HVAC ducts, frame around them. Leave space for proper airflow.
- Follow local codes: Check your area’s building codes. Some may require specific framing methods or materials.
- Add drywall backers to prepare for finishing a basement. Install short pieces of lumber between studs where drywall seams will fall. This gives extra support.
Finishing Touches and Considerations
Framing your basement walls is just the start. You’ll need to add fire blocks and drywall backers to meet building codes. Don’t forget to address moisture issues and add insulation for a cozy space.
Install Fire Blocking and Drywall Backers
Fire blocking and drywall backers are crucial for basement safety and structure. These elements help prevent fire spread and provide support for wall coverings.
- Install fire blocking:
- Cut 2×4 lumber to fit between wall studs
- Place blocks every 10 feet vertically
- Nail blocks securely to studs
- Use treated lumber for areas touching concrete
- Add drywall backers:
- Cut 2×4 pieces to fit between studs
- Space backers 2 feet apart
- Nail backers flush with stud faces
- Ensure all corners have backing for drywall support
- Check local building codes: Ensure compliance for the foundation wall.
- Verify fire-blocking requirements
- Confirm proper materials for your area
- Ensure compliance with safety standards
- Address moisture concerns:
- Use pressure-treated lumber where wood contacts concrete
- Apply waterproof sealant to cut ends of treated wood
- Install a vapor barrier if required by local code to protect the basement floor.
- Prepare for utilities: Ensure they are properly integrated into the finished basement.
- Plan openings for electrical boxes
- Leave space for plumbing runs
- Mark locations for HVAC ducts
- Install blocking for fixtures:
- Add extra support for heavy items like TVs or shelves
- Use solid blocking between studs at attachment points
- Secure blocking with nails or screws
Address Moisture and Insulation Needs
Moisture and insulation are key concerns in basement framing. Install a vapor barrier behind the foam board to stop water vapor. Use 2-inch XPS foam board for insulation after waterproofing dries.
Apply construction adhesive in vertical strips on the foam, tape the seams, and caulk the bottom. This setup keeps your basement dry and cozy. For the frame, use pressure-treated lumber or add a sill gasket to protect against moisture.
Choose from fiberglass insulation, black plastic, or vapor barrier as suitable gasket options.
Conclusion
Framing a basement wall is a rewarding DIY project. With the right tools and knowledge, you can transform your space. Measure carefully, use proper safety gear, and follow local building codes.
Your newly framed basement will add value to your home and create extra living space. Take on this project with confidence, and enjoy the results of your hard work.
FAQs
1. What tools do I need to frame a basement wall?
You’ll need proper tools for this DIY job. Get a carpenter’s level, tape measure, circular saw, hammer, and drill. Don’t forget safety gear like gloves and goggles. For fastening, you’ll want nails, screws, and a nail gun. A sledgehammer might help with demo work.
2. How do I start framing my basement walls?
Begin by marking your layout. Snap lines on the floor to guide your framing. Measure the distance from the floor to the joists at several points. Use the shortest measurement to cut your studs. This ensures your wall fits snugly.
3. What’s the right stud spacing for basement walls?
Most building codes require 16-inch stud spacing. However, check local regulations. Proper spacing provides adequate support and meets code requirements. It also makes it easier to install drywall later.
4. How do I secure the top and bottom plates?
Fasten the bottom plate to the concrete floor using Tapcon screws. For the top plate, secure it to the floor joists above. If joists run perpendicular to your wall, use blocking between joists for attachment points.
5. What’s a fire stop and why is it important?
A fire stop is a horizontal piece of lumber installed between studs. It slows the spread of fire in walls. Install fire stops every 10 feet vertically in your framed walls. This is a crucial safety measure when you finish the basement.
6. Can I frame basement walls alone?
While possible, framing alone can be challenging. Long walls are hard to lift solo. If working alone, build wall sections in manageable lengths. Then, raise and connect these sections. Consider asking a friend for help with larger pieces.