Framing a basement window can be tricky. Many homeowners struggle with this task, unsure how to start or what materials to use. It’s a common problem that can lead to drafts, leaks, and wasted energy.
Did you know that proper window framing can cut your energy bills by up to 15%? That’s right! This guide on “How To Frame A Basement Window” will walk you through each step. You’ll learn the tools you need, how to measure, and tips for a pro finish.
Ready to upgrade your basement? Let’s get started!
Key Takeaways
- Proper window framing can cut energy bills by up to 15%, making it a worthwhile DIY project.
- Key tools needed include a caulk gun, drill, reciprocating saw, utility knife, and safety gear like glasses and gloves.
- Accurate measurements are crucial; measure the width and height at multiple points and use the smallest measurement for the frame.
- Installing glass block windows involves setting the panel in mortar, ensuring its level, and sealing gaps with more mortar and silicone caulk.
- Finishing touches like PVC trim, window treatments, and proper caulking help achieve a professional look and improve functionality.
Tools and Materials Needed
Framing a basement window needs the right gear. Here’s what you’ll need to get the job done:
- Caulk gun: For applying exterior-grade caulk to seal gaps
- Drill/driver: To fasten screws and create pilot holes
- Reciprocating saw: For cutting openings in walls
- Utility knife: To trim insulation and flashing tape
- Exterior-grade caulk: Used twice for sealing around the window
- New basement window: Choose one that fits your opening
- Screws: For securing the window frame
- Shims: To level and plumb the window
- Expandable urethane foam: For insulating around the frame
- Flashing tape or roll flashing: To waterproof the window opening
- Measuring tape: For accurate sizing of the window opening
- Level: To ensure the window is straight
- Safety glasses: To protect your eyes during work
- Work gloves: For hand protection while handling materials
- Hammer: For nailing trim or framing pieces
- Circular saw: To cut lumber for framing if needed
Step-by-Step Guide to Framing a Basement Window
Ready to frame your basement window? Our guide breaks it down into easy steps. You’ll learn how to measure, prep, and install like a pro.
Measuring and Preparing the Window Opening
Framing a basement window starts with accurate measurements. Here are the steps for measuring and prepping your window opening:
- Clear the area around the window, removing any old trim or obstructions.
- Measure the width of the window opening at the top, middle, and bottom. Use the smallest measurement for your frame.
- Measure the height of the opening on both sides and in the center. Again, use the smallest measurement.
- Mark stud locations on the bottom plate based on your window dimensions.
- Account for insulation when measuring. Add about 1 inch to each side for proper fit.
- Check if the opening is square using a carpenter’s square or measuring diagonally.
- Clean the opening thoroughly, removing any dirt, debris, or old caulk.
- Apply a waterproof sealant around the opening to prevent moisture issues.
- Cut 2×4 lumber for the frame using your measurements. Double-check before cutting.
- Dry-fit the frame pieces to ensure they fit snugly in the opening.
- Mark locations for shims to level and plumb the frame.
- Pre-drill holes in the frame for easier installation later.
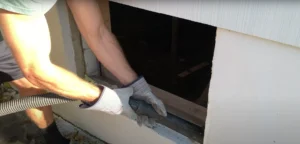
Installing the Window Frame and Insulation
Installing a window frame and insulation in your basement can be an enjoyable DIY project. Here are the steps to make your basement comfortable and energy-efficient.
- Clean the window opening thoroughly to ensure a snug fit for the new frame.
- Apply a bead of adhesive around the window opening for a secure bond.
- Place the window frame into the opening, making sure it’s level and plumb.
- Secure the frame with screws or nails, spacing them every 16 inches along the sides.
- Add rigid foam insulation boards around the window perimeter for better energy efficiency.
- Tape the insulation to the frame to create an airtight seal.
- Fill any gaps with caulk or foam to prevent air leaks and improve insulation.
- Install the window sash and test its operation to ensure smooth opening and closing.
- Add an extension jamb if needed to match the wall thickness.
- Apply trim molding around the window for a finished look.
- Paint or stain the frame and trim to match your basement’s decor.
- Check for any drafts or leaks after installation and address them promptly.
How to Install Glass Block Windows in Basement
Glass block windows add style and light to basements. Here’s how to install them:
- Measure the window opening carefully. Pick a glass block window style that fits.
- Take out the old window. Clean the opening well.
- Mix mortar to create a stable bed for the new window panel.
- Spread mortar evenly in the opening with a trowel.
- Set the glass block panel into the mortar bed gently.
- Use a level to make sure the window is straight.
- Put shims around the edges to hold the window in place.
- Fill gaps between the window and opening with more mortar.
- Smooth out the mortar with your trowel for a neat look.
- Let the mortar dry fully. This usually takes about 24 hours.
- Remove the shims once the mortar is dry.
- Apply silicone caulk around the edges of the window.
- Smooth the caulk with your finger for a water-tight seal.
- Clean any excess mortar or caulk from the glass blocks.
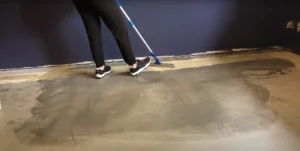
Finishing Touches for a Professional Look
After installing your basement windows, it’s time to add the finishing touches. Trim work significantly improves the overall appearance of your project. For areas prone to moisture, PVC trim is an excellent option.
It resists warping and rotting, unlike wood. To attach pine trim, use finish nails and adhesive caulk on the metal frame.
Consider window treatments as well. Blinds and curtains enhance aesthetics while also providing light control and privacy. Caulking around the trim is essential for a secure finish.
It seals gaps and prevents drafts. These small details will elevate your DIY basement window project.
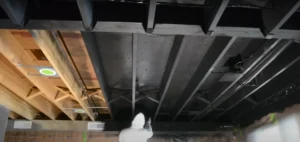
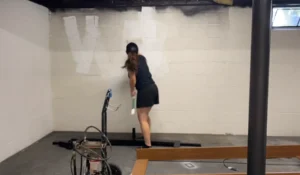
Basement Design Considerations
Basement design needs careful thought. Light plays a big role in making a space feel open and welcoming. Adding more windows or using bright colors can help. Think about the floor plan too.
Open layouts work well in basements, creating a sense of space. Don’t forget about moisture control. Good ventilation and proper insulation are key to keeping your basement dry and comfy.
Storage is another important factor in basement design. Built-in shelves or cabinets can help you make the most of the space. Consider the ceiling height when planning your layout.
Low ceilings might limit your options for lighting fixtures or tall furniture. Lastly, think about noise. Sound-proofing materials can help if you plan to use the basement as a living area or home theater.
Conclusion
Framing a basement window is a doable DIY project. With the right tools and steps, you can upgrade your space. This guide gives you the know-how to tackle the job. You’ll save money and gain pride in your work.
Now, go forth and frame those windows like a pro!
FAQs
1. What tools do I need to frame a basement window?
You’ll need a few key items: a saw, level, tape measure, screws or nails, and treated lumber. Don’t forget safety gear like gloves and goggles. For the frame itself, you’ll use wood that fits snugly around the window.
2. How do I start framing around a basement window?
Begin by measuring the window opening. Cut treated lumber to fit the top, bottom, and sides. Make sure the wood is flush with the window. Secure the frame to the concrete wall with fasteners. Leave enough room for insulation and drywall later.
3. Should I use pressure-treated wood for the window frame?
Yes, always use pressure-treated lumber when framing basement windows. This type of wood resists moisture and rot, which is crucial in damp basement conditions. It helps prevent issues down the line during your basement finishing project.
4. How do I ensure the frame is level and square?
Use a level on all sides of the frame as you install it. Check that corners are at 90-degree angles. This step is vital for the window to properly fit and function. Take your time here – it’ll pay off later.
5. What’s the best way to insulate around a framed basement window?
After framing, fill gaps with foam insulation. This helps keep out drafts and moisture. Cover the insulation with a vapor barrier before adding drywall. Good insulation is key for energy efficiency in your finished basement.
6. Do I need to consider egress requirements when framing a basement window?
If you’re turning your basement into a living space, you may need to install an egress window. These are larger and must meet specific size requirements for safety. Check local building codes before starting your DIY home improvement project.