Are your basement stairs looking worn out or unsafe? Maybe the treads are scratched, or the risers lack color. Unfinished basement stairs can make your home less appealing and harder to use.
Finishing basement stairs can improve both their look and safety, and it might even add value to your home. In this guide, you will learn How To Remodel Basement Stairs with easy DIY steps.
From sanding and painting to installing new treads and railings, we’ll help you create a stunning stair makeover. Ready to transform your stairs?
Key Takeaways
- Prepare First: Gather all tools and materials before starting your remodel. This includes wood, saws, paint, and safety gear.
- Sanding and Painting: Smooth the stairs with sandpaper. Then, paint or stain them to make them look new and protect the wood.
- Install New Treads and Risers: Measure and cut new stair parts. Use adhesive and nails to attach them securely for a sturdy finish.
- Add Storage and Railings: Build shelves under the stairs for extra space. Install decorative railings to enhance the look and safety.
- Follow a Timeline: Plan each step and stick to your schedule. This helps complete the project on time and stays within budget.
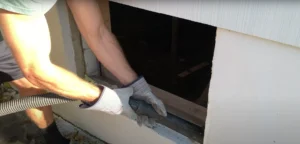
Preparing Your Basement Stairs for Remodeling
Start by gathering all the tools and materials you need for the project. Clean the stairs and make sure they are ready to be remodeled.
Equipment and Materials Needed
Before starting your basement stair remodel, gather all the essential equipment and materials. Being prepared will help your DIY project run smoothly.
Equipment and Materials Needed
- Solid Oak Strips and Quarter-Inch Oak Plywood
- Use these for new stair treads and the bullnose. They provide durability and a beautiful finish.
- Hardboard for Risers
- Hardboard is sturdy and perfect for the vertical part of each step.
- Circular Saw
- A must-have tool for cutting wood materials accurately.
- Jigsaw
- Ideal for making curved or intricate cuts in the plywood and hardboard.
- Table Saw
- Ensures precise cuts for uniform stair components.
- Palm Router
- Helps in shaping edges and adding decorative details to the stairs.
- Pin Nailer
- Useful for attaching treads and risers securely without bulky nails.
- Primer for Stringers
- Prepares the wood surface for painting or staining, ensuring better adhesion.
- Stain and Polyurethane
- Apply multiple coats of stain for color and a single coat of polyurethane for protection.
- Wood Conditioner
- Pre-treats the wood to ensure an even stain application.
- Construction Adhesive
- Strengthens the bonds between different wood pieces for a sturdy stairway.
- Respirator and Protective Gear
- Essential for personal safety while sanding, painting, and handling tools.
- Sandpaper and Sanding Tools
- Smooths the wood surfaces before painting or staining.
- Adhesive for Treads
- Secures the new stair treads firmly in place.
- Balusters and Decorative Railings
- Adds a stylish touch to your stairway while ensuring safety.
Gathering these tools and materials will set you up for a successful basement stair remodel. Each item plays a crucial role in achieving a stunning and functional stair makeover.
Step-by-Step Guide to Remodeling Basement Stairs
Follow our easy guide to sand, paint, and install new steps, transforming your basement stairs into a stunning feature—read on to get started.
Sanding, Painting, and Staining
Refreshing your basement stairs with DIY sanding, painting, and staining transforms them into a stunning feature. Follow these steps to remodel your basement stairs successfully.
- Sanding the Stairs
- Use a random orbital sander to smooth wooden stair treads.
- Sand off old paint and rough areas.
- Ensure each step is even for a flawless finish.
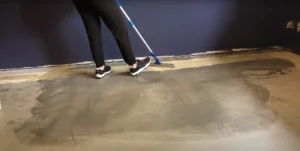
- Cleaning and Preparing
- Clean the stairs to remove dust and dirt.
- Apply painter’s tape to protect walls and fixtures.
- A clean surface helps paint and stain adhere better.
- Painting the Stairs
- Choose paint or stain based on your design.
- Apply the first coat of paint to the stair risers and treads.
- Allow the paint to dry before adding more coats.
- Staining the Wood
- Select a stain color that matches your home’s interior.
- Optionally, apply pre-stain wood conditioner for an even color.
- Wipe or brush on the stain in the direction of the wood grain.
- Finishing with Polyurethane
- Coat the stairs with polyurethane to protect the surface.
- This step adds durability, especially in high-traffic areas.
- Let the polyurethane dry completely before using the stairs.
Installing New Treads and Risers
After sanding, painting, and staining your basement stairs, it’s time to install new treads and risers. This step will make your staircase look stunning and last longer.
- Measure the Stairs
- Measure each tread and riser carefully.
- Write down the dimensions to ensure a perfect fit.
- Cut the New Treads and Risers
- Use a saw to cut wood or luxury vinyl treads.
- Cut the risers to match the measured heights.
- Remove Old Treads and Risers
- Use a pry bar to take out old treads and risers.
- Remove any carpet and tack strips completely.
- Apply Construction Adhesive
- Spread adhesive on the back of each new tread and riser.
- This helps them stay in place securely.
- Nail the New Treads and Risers
- Use a nail gun to attach the new pieces.
- Ensure they are level and flush against the walls.
- Check for Evenness
- Make sure all treads and risers are even.
- Adjust if any parts are not level.
- Secure Handrails
- Attach new railings using brackets for stability.
- Choose railings that match your basement’s design.
- Protect the Wood
- Apply polyurethane or Varathane to the new stairs.
- This protects them from damage and heavy foot traffic.
- Finish with a Stair Runner or Carpet
- Add a stair runner for a modern look.
- Choose synthetic carpet for easy maintenance.
- Clean Up
- Remove any excess adhesive and nails.
- Make sure the stairs are safe and ready to use.
Installing new treads and risers is a key part of your basement remodel. Use hardwood or vinyl flooring to match your space. These steps will help you finish your basement stairs beautifully.
Advanced Customizations
Upgrade your stairs with clever storage and elegant railings to make your basement stand out—keep reading to find out how.
Adding Storage Solutions Under Stairs
Adding storage under stairs can maximize your basement’s space. Use plywood or clear pine lumber to build sturdy shelves. Half-depth shelves make it easy to reach items. Install a door with a piano hinge for smooth opening and closing.
MDF works well for the storage door. Make sure to trial-fit the door to ensure it operates smoothly. This DIY stair project offers affordable ways to enhance your basement staircase while keeping things organized.
Smart storage solutions make your basement both beautiful and functional.
Installing Decorative Railing and Balusters
Black iron balusters add a sleek, modern touch to your basement stairway. They match your home’s décor and are budget-friendly. Gather a drill and a 1-inch paddle or spade drill bit for installation.
Use baluster shoes to securely attach the iron balusters. This DIY project enhances your basement steps and contributes to a beautiful basement feel. Move on to the remodeling timeline and process.
Understanding the Basement Remodeling Process and Timeline
Understanding the basement remodeling process and timeline helps keep your project on track. Our basement renovation focused on the staircase after 15 months of wear. We waited 13 months post-move-in to replace the stairs, avoiding damage from other projects.
Reusing the three stringers cut our carpenter service costs. Start with a cost breakdown to manage your budget. Plan DIY projects like sanding, painting, and installing new wood treads.
Setting a clear timeline ensures your basement stair ideas become a stunning reality.
Keeping a schedule makes the process smoother. Allocate time for each step, from prepping the stairs to adding decorative railings. Reusing materials and choosing budget-friendly options can save money.
Follow your timeline to finish the basement stairs efficiently. This approach helps create beautiful wooden stairs that enhance your home’s interior design.
Conclusion
Remodeling your basement stairs can greatly improve your home’s look and safety. With the right tools and steps, you can create beautiful stairs on your own. Choose materials that fit your budget and style.
Enjoy a fresh, inviting space with your new staircase. Start your DIY stair makeover today and see the amazing results.
FAQs
1. What are the best ways to finish basement stairs when doing it yourself?
To finish basement stairs yourself, start by choosing materials like oak treads or polyvinyl chloride. Install wooden risers and stair treads to match your home’s style. Use porch and floor enamel to paint the front edge for a clean look. Follow tutorials on YouTube for step-by-step guidance on each process.
2. How can I protect my stairs from damage in a basement renovation?
Protect your stairs from damage by using durable materials that can handle a lot of foot traffic. Install sturdy stair treads and ensure the staircase leading to the basement is strong. Apply protective finishes like floor enamel to shield the steps. Regular maintenance will keep the stairs looking new.
3. What materials should I use for a DIY basement stair remodel?
Choose materials that are diy-friendly and match your home’s decor. Oak treads provide a classic look, while polyvinyl chloride is great for easy cleaning. Wooden risers add strength and style. Select stair treads to match the rest of your basement floor for a unified appearance.
4. How can I make my basement stairs look complete and match my home?
To make basement stairs look complete, use stair treads that match your home’s flooring. Paint the wooden risers with porch and floor enamel for a seamless look. Add a footer at the bottom of the stairs for a finished appearance. Ensure the steps look neat and align with your living space’s design.
5. Are there budget-friendly options for remodeling basement stair steps?
Yes, there are budget-friendly ways to remodel basement stairs. Use affordable materials like wooden risers and polyvinyl chloride treads. Watch YouTube videos for cost-saving tips and upload original content for ideas. Doing it yourself can save money while achieving a great look.
6. What safety tips should I follow when remodeling basement stairs?
When remodeling basement stairs, prioritize safety by ensuring each step is secure and free from damage. Use sturdy materials like oak treads and reinforce the staircase leading to prevent accidents. Apply non-slip finishes to stair treads and regularly check for any wear from heavy foot traffic.